31. General Settings » User Management
In Configuration » General Settings » User Management, you can add, modify and delete Console user accounts and roles.
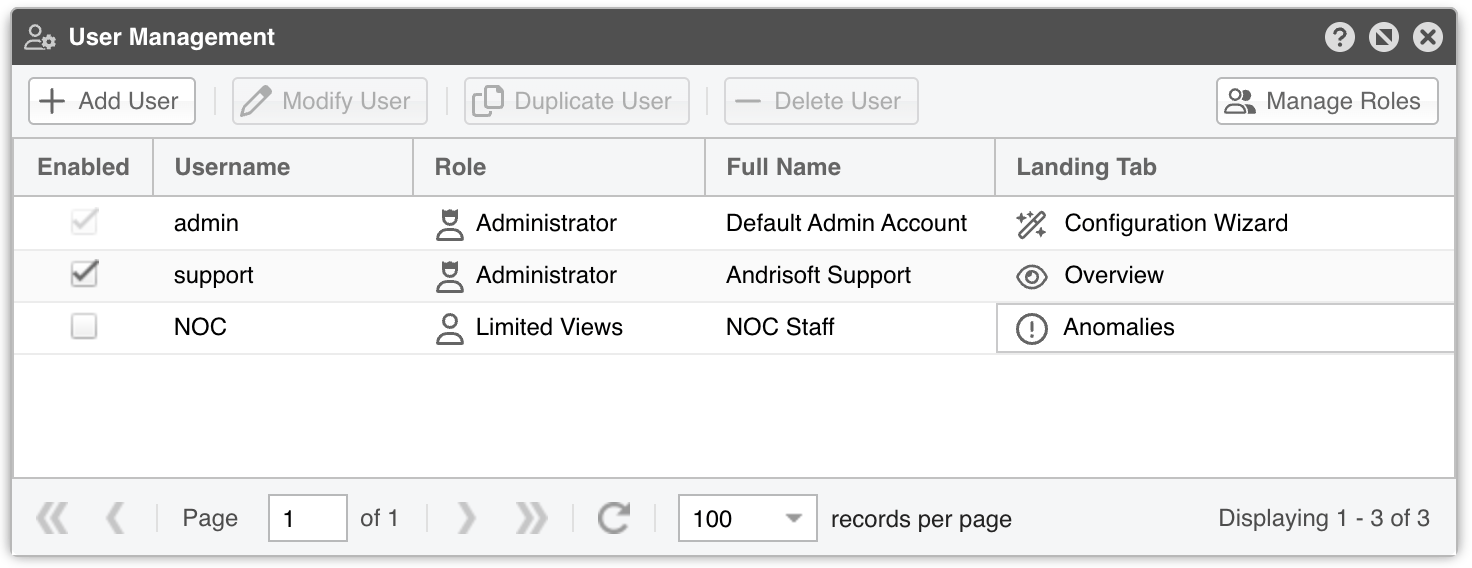
To create a Console user account, click [Add User], then assign the Role. By default, there are Administrator and Operator roles, but you can define new roles with granular permissions (reports/configuration) by clicking [Manage Roles].
To modify an existing account, either double-click it or select it and choose [Modify User].
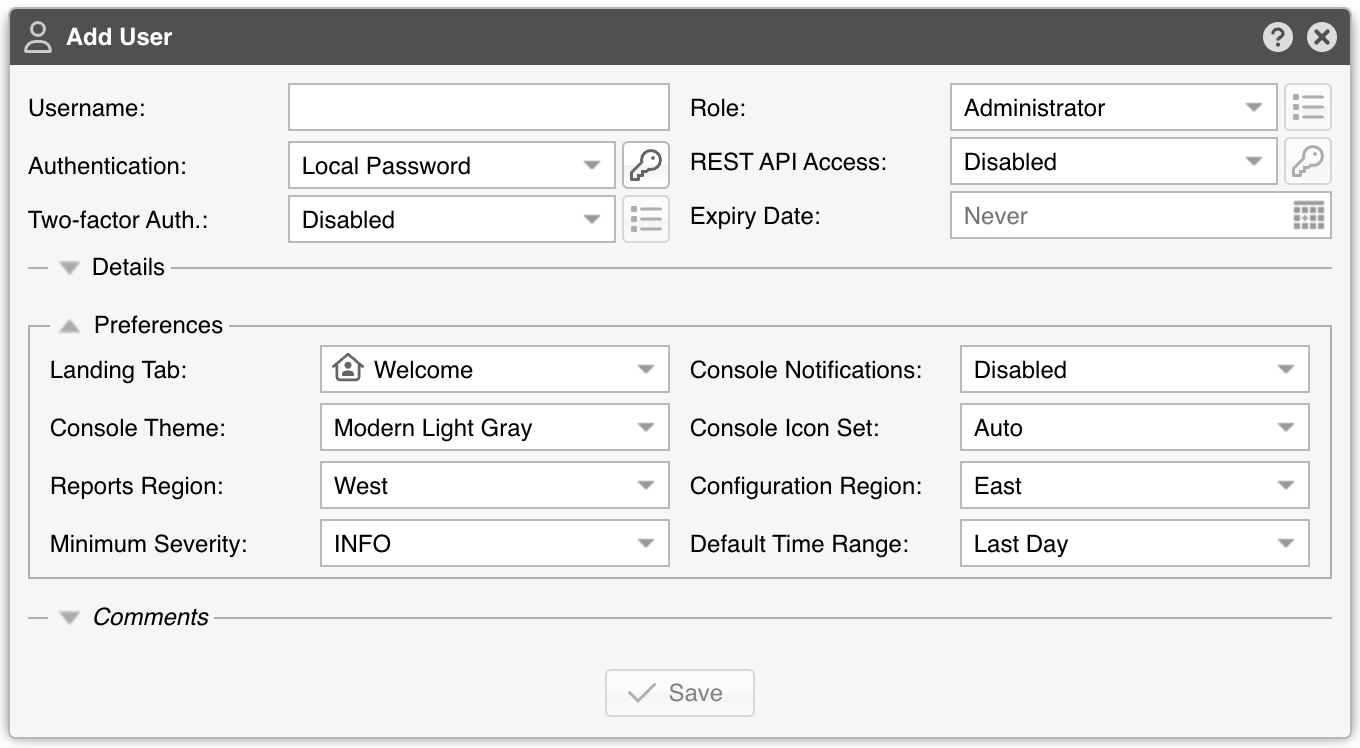
These parameters are mandatory when creating or modifying a user account:
● Username – A unique account name● Role – Choose one of the existing roles in Configuration » General Settings » User Management » Manage Roles. For granular, permission-based access, create a new role first, then select it here● Authentication – The following authentication options are available:▪ Local Password – The user is authenticated with the password entered when clicking the Options button. The database stores only the password hash, so it’s not possible to recover the plaintext password▪ Remote – The user is authenticated by the LDAP or RADIUS servers configured in General Settings » User Authentication● REST API Access – Defines whether the user can access the REST API via their credentials or an API Key (set when clicking the Options button):▪ Disabled – No API access▪ Enabled – API access + Console access▪ Exclusive – API access only (no Console)● Two-factor Authentication – Requires a Time-Based One-Time Password (TOTP) app (e.g., Google Authenticator). TOTP works only if server and mobile device clocks are in sync● Expiry Date – The user cannot log in after this date. Leave blank to disable expiry● Landing Tab – The tab shown immediately after logging in. The list grows as you add Sensors, dashboards, IP Groups, or other objects● Console Notifications – Controls visual/audio notifications from Responses. May need a page refresh for immediate effect● Console Theme – Changes the overall UI appearance● Console Icon Set – Changes the appearance of icons:▪ Auto – Selects icons based on the Console Theme (Modern for modern themes, Classic otherwise)▪ Modern – Monochrome, SVG-based▪ Classic – Colored, bitmap-based● Reports Region – Adjusts the position of the Reports Region in the interface● Configuration Region – Adjusts the position of the Configuration Region in the interface● Minimum Severity – The lowest severity level of events displayed in the Console● Default Time Range – The default timeframe for dashboards upon opening
31.1. Roles
Each Console user is assigned exactly one role, which defines that user’s access level. Three role classes exist:
● Administrator – Unrestricted access to everything, including managing all user accounts and roles (built-in)● Operator – Can view every report and change any configuration, but cannot manage user accounts or roles and has no access to General Settings » License Manager (built-in)● Guest – A customizable class with granular, permission-based access to reports, dashboards, Sensors, IP Groups, and configuration objects. Every role you add is a Guest role, shaped by the Reports Access and Configuration Access settings described below
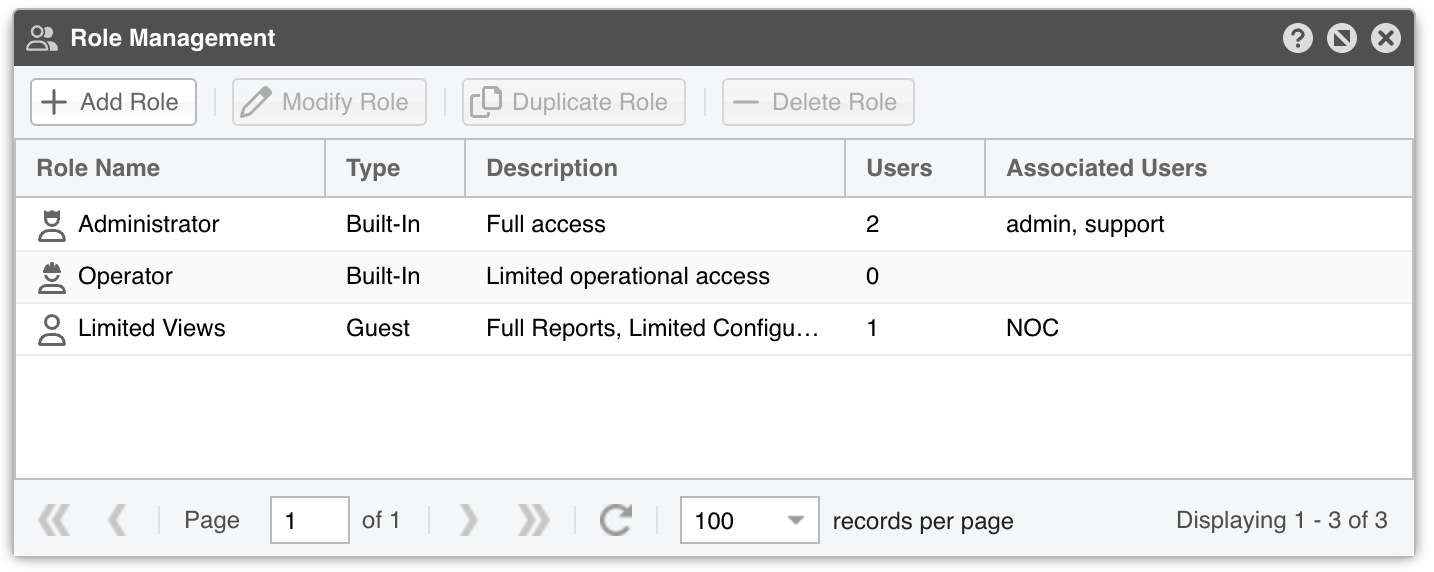
To create a Guest role, open Configuration » General Settings » User Management » Manage Roles and click [Add Role].
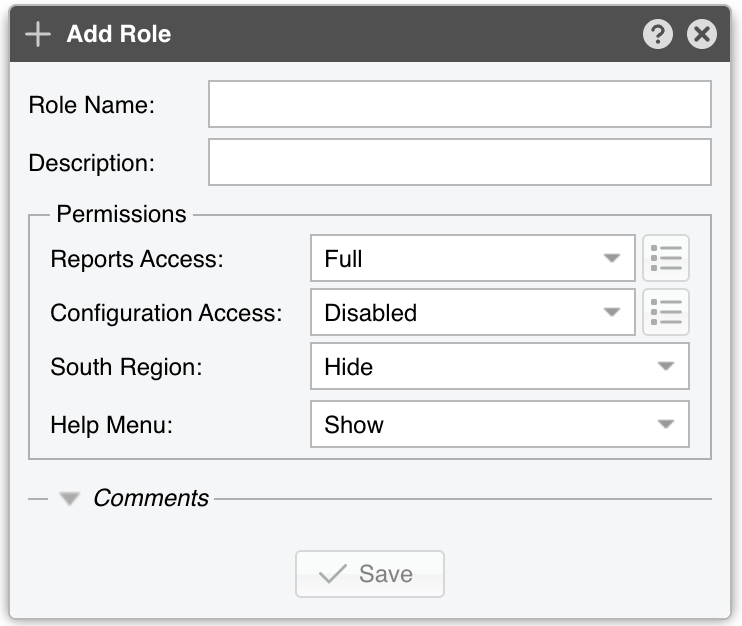
A role has the following parameters:
● Role Name – A unique name for the role● Description – An optional short description, shown next to the role in the Manage Roles list● Reports Access – The role’s access to the Reports Region:▪ Full – Full access to every report, but the role cannot create Dashboards▪ Custom – Activates the [Options] button beside the selector; click it to set granular, per-object permissions (see Custom Reports Access)● Configuration Access – The role’s access to the Configuration Region:▪ Disabled – The role cannot open the Configuration Region▪ Custom – Activates the [Options] button beside the selector; click it to set granular, per-object permissions (see Custom Configuration Access)● South Region – Show or hide the South Region● Help Menu – Show or hide the Help menu in the Upper Menus● Comments – Optional free-form notes about the role, in a section that is collapsed by default
31.1.1. Custom Reports Access
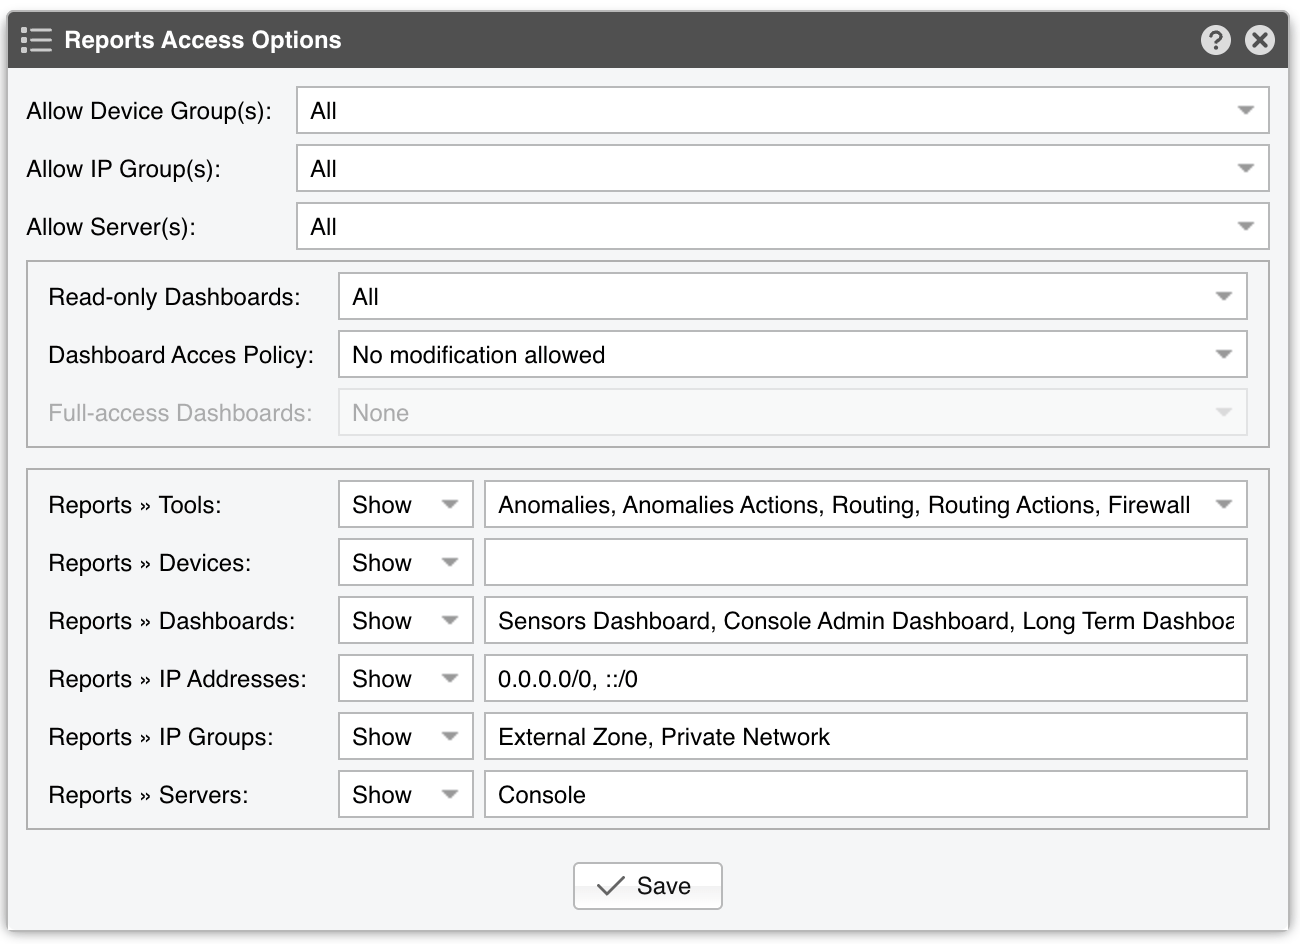
When a role’s Reports Access is set to Custom, click the adjacent [Options] button to open the Reports Access Options window shown above. The top selectors set which objects the role may reach in reports, the middle section governs its dashboard permissions, and the bottom section chooses which panels appear in the role’s Reports region and what each one contains. Object selectors default to All (or None for Full-access Dashboards); left on All, a selector covers every object of that type, including ones added later.
Each panel of the role’s Reports region is toggled below with a Show / Hide selector. For every panel except Tools, the field beside it is a read-only preview of what the panel will contain, derived from the access selectors above.
31.1.2. Custom Configuration Access
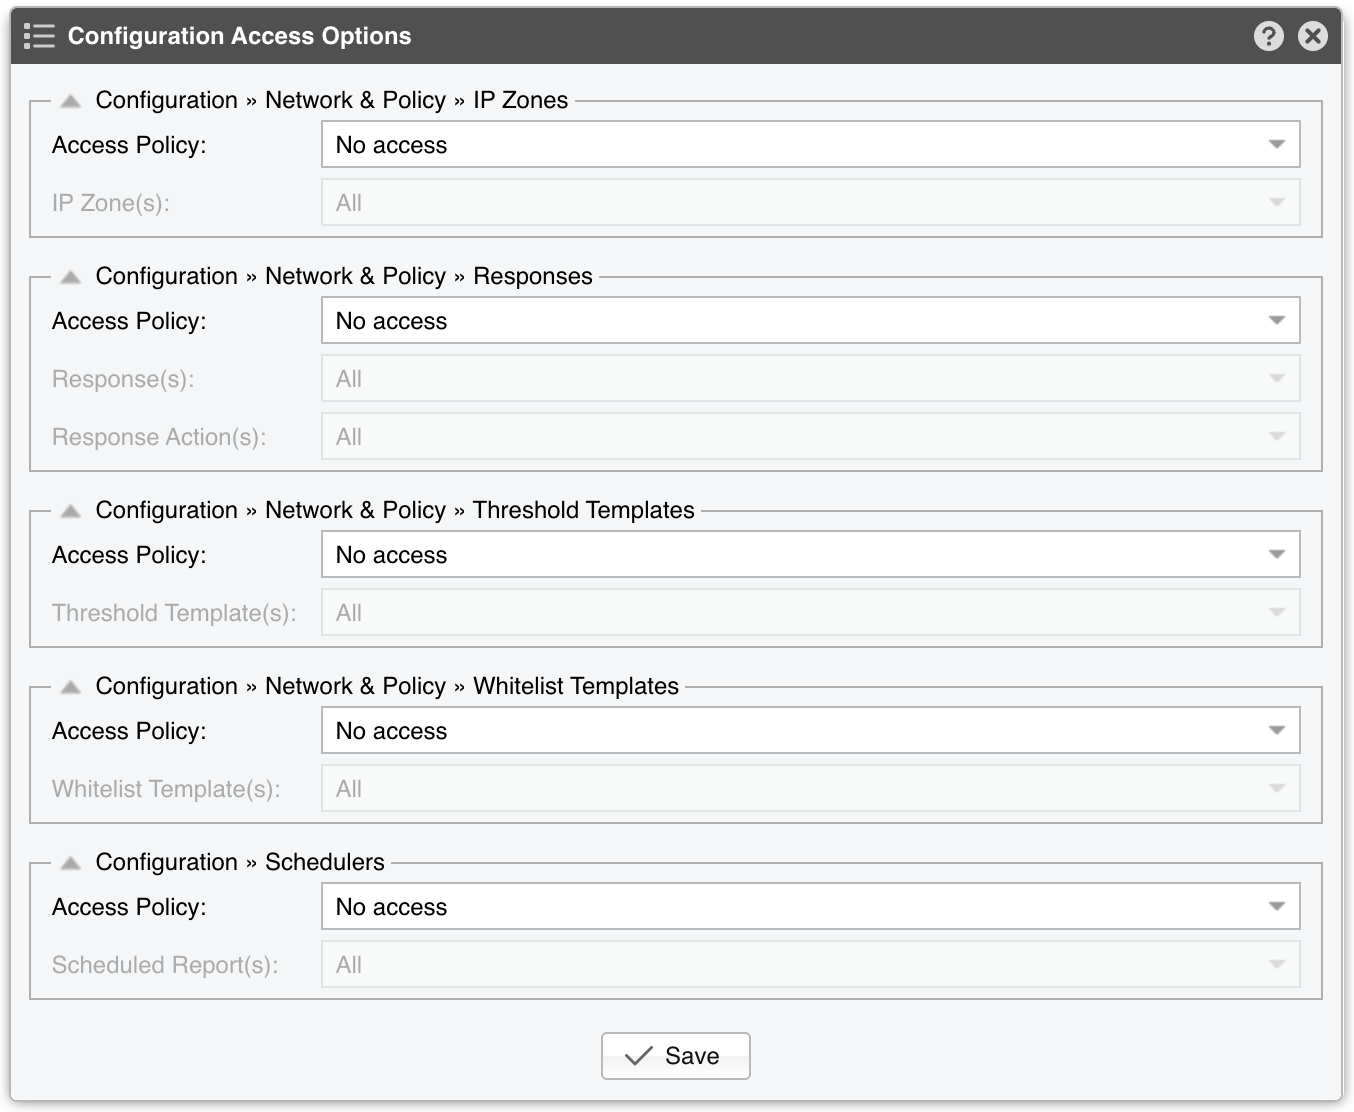
When a role’s Configuration Access is set to Custom, click the adjacent [Options] button to open the Configuration Access Options window shown above. It grants the role selective, per-object access to the configuration areas under Configuration » Network & Policy and Configuration » Schedulers.
Each area provides an Access Policy selector that sets the level of access, followed by one or more object selectors naming the specific objects the policy applies to. An object selector stays disabled until its Access Policy grants access; left on All, it covers every object of that type, including ones added later.