19. Components » SNMP Sensor
SNMP Sensor monitors the bandwidth usage of SNMP-enabled devices — such as routers, switches, or servers — by querying each port’s traffic counters. These queries prompt reply packets from the monitored device. For more on the pros and cons of SNMP-based monitoring, see the Choosing a Method of Traffic Monitoring section.
To add an SNMP Sensor, click the [+] button from the title bar of the Configuration » Components panel. To modify an existing one, select it from Configuration » Components.
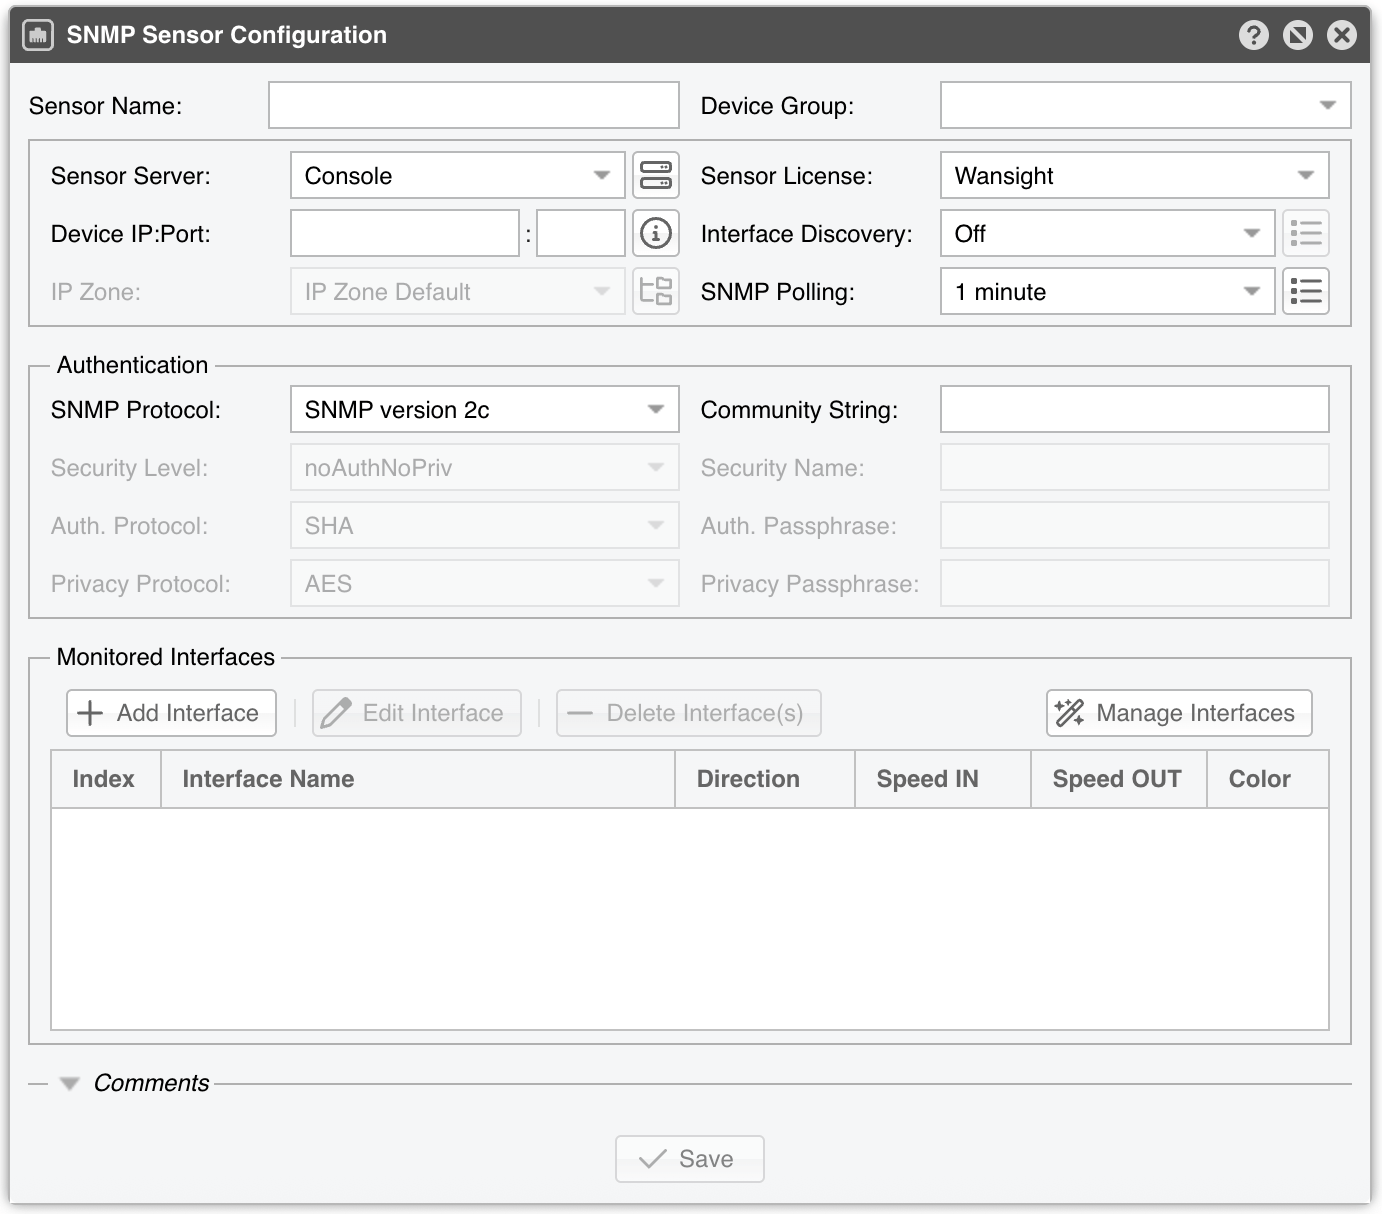
The SNMP Sensor Configuration window opens on a form whose Sensor Name, Sensor Server and Device IP are mandatory: [Save] stays grayed out until the three of them are filled in. An SNMP Sensor also needs either at least one monitored interface or an active Interface Discovery — saving without either is refused.
SNMP Sensor Configuration parameters:
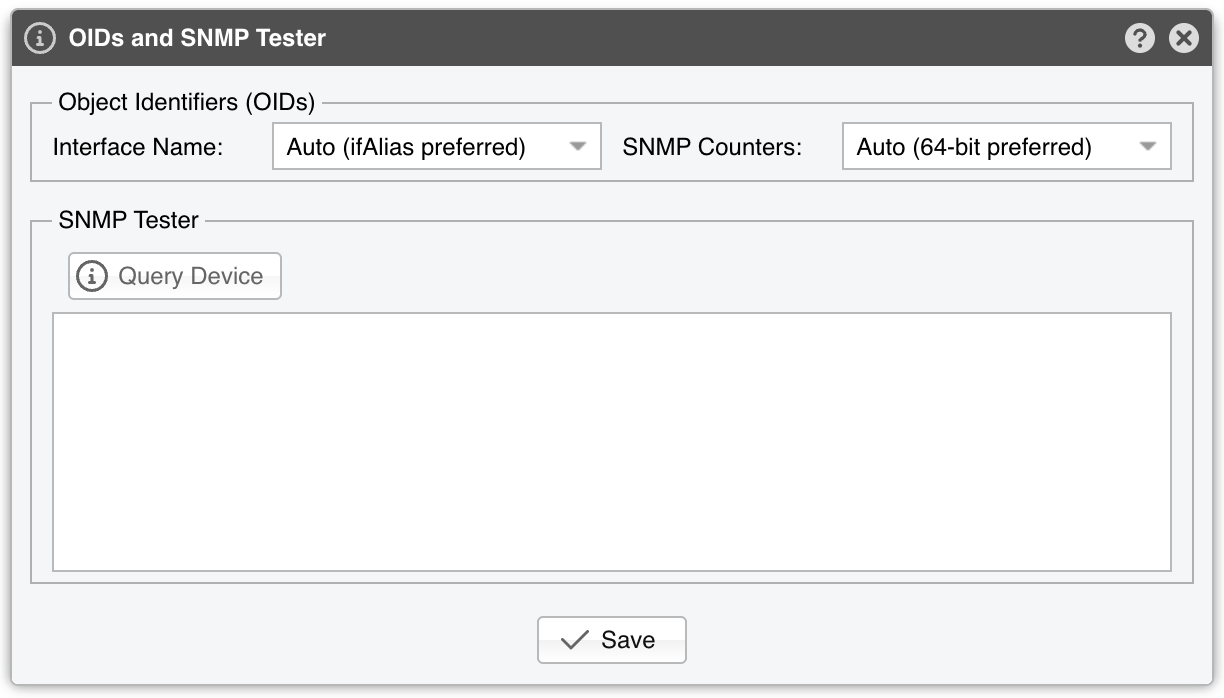
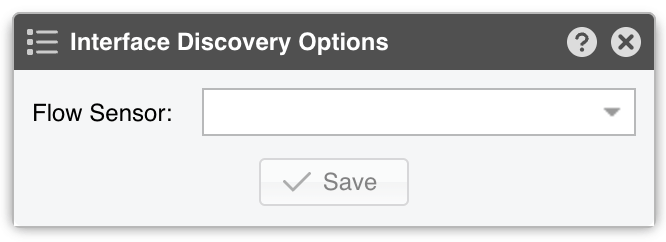
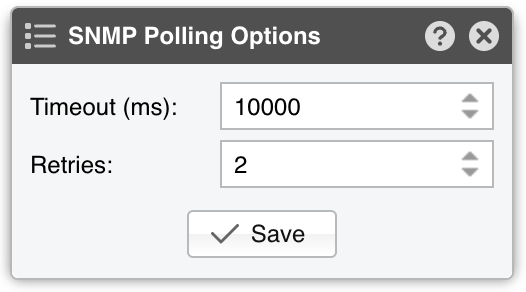
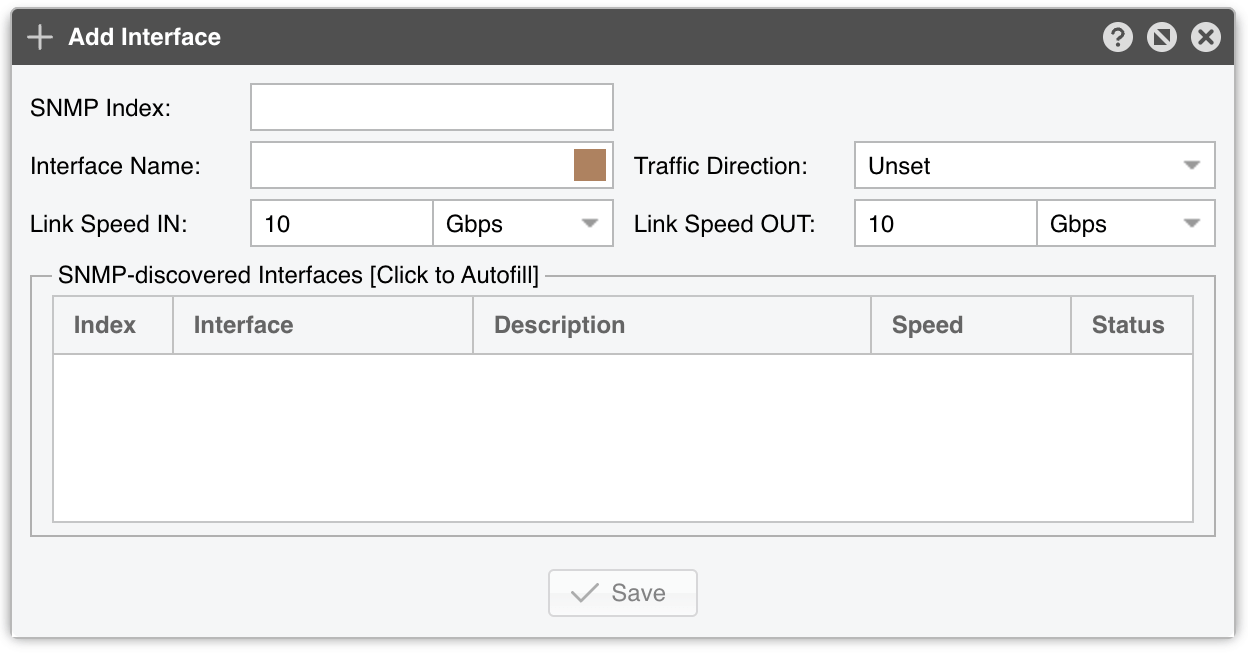
● Sensor Name – A short name to identify the SNMP Sensor● Device Group – Enter a description for organizational or role-based access purposes (e.g., location, characteristics). The combo box is editable, so you can type a new group instead of selecting an existing one● Sensor Server – Select a server that meets the minimum system requirements for running an SNMP Sensor. The button on the right opens the configuration of the selected server● Sensor License – The SNMP Sensor uses a Wanguard or Wansight license, and defaults to Wansight. While Wanguard supports all features, the limited Layer 3+ visibility of SNMP restricts most capabilities. Wansight excludes anomaly detection and reaction● Device IP:Port – Enter the IP address of the networking device and specify the SNMP port (default 161/UDP). No two SNMP Sensors may monitor the same device on the same port. The button on the right opens Object Identifiers & SNMP Tester; it reports an error until the Device IP is valid and the authentication below is filled in• Interface Name – The OID that interface names are read from: Auto (ifAlias preferred), ifAlias, ifDescr, ifName, ifDescr ifAlias, or ifName ifAlias• SNMP Counters – Auto (64-bit preferred), 32-bit, or 64-bit. Choose 32-bit only if your device doesn’t support 64-bit counters. SNMP version 1 cannot use 64-bit counters at all, and the Console refuses to save that combination• SNMP Tester – [Query Device] polls the device and prints the reply in the pane below, so you can confirm that the address, port and credentials work before saving● Interface Discovery – Manages the interface discovery feature:▪ Off – Monitors only the interfaces you add manually to the Monitored Interfaces grid▪ Auto-discover interfaces – Automatically imports all interfaces, which can clutter the Console with many unnecessary entries. This is not recommended▪ Import from Flow Sensor – Populates the Monitored Interfaces grid with interfaces from an existing Flow Sensor. This is the only value that enables the options button, and it requires you to name the Flow Sensor to import from● IP Zone – When using a Wanguard license, SNMP Sensor can evaluate threshold rules from the chosen IP Zone, and naming one is mandatory. A Wansight license grays the field out. Because SNMP lacks IP-level detail, a threshold rule is applicable only if it has:◦ Prefix set to 0.0.0.0/0◦ Domain set to Subnet◦ Value set to an absolute amount, not a percentage◦ Decoder set to IP● SNMP Polling – Polling is the process of sending SNMP requests periodically to retrieve up-to-date information. While a low polling interval provides more granular reports, it can increase load if many interfaces are monitored. Choose a value between 5 seconds and 5 minutes; the default interval is 1 minute• GETBULK Polling – When Enabled, the SNMP Sensor reads the interface counters with one GETBULK walk per counter column instead of one GET request per interface, which cuts the number of requests on devices with many monitored interfaces. It is Disabled by default and has no effect with SNMP version 1, which lacks the GETBULK operation• Max. Message (bytes) – The largest SNMP message the device is asked to return. Leave it empty (Auto) to let the SNMP Sensor probe the device for it at startup, or enter a value between 484 and 65507• Timeout (ms) – The amount of time (in milliseconds) to wait for an SNMP reply before considering the request failed. The default is 10,000 ms• Retries – The number of times the SNMP Sensor resends a request if there’s no response within the specified timeout. The default is 2● SNMP Protocol – The first field of the Authentication section. It determines how the SNMP Sensor authenticates, and which of the fields that follow are enabled:▪ SNMP version 1 – Simple setup (plaintext community) with only 32-bit counters and minimal security▪ SNMP version 2c – Same as version 1 but supports 64-bit counters, essential for gigabit interfaces. This is the default▪ SNMP version 3 – Adds encryption and authentication to the 64-bit counters from version 2. More secure but also more complex to set up than a simple community string● Community String – A shared “password” for SNMP v1 and v2c. The device authenticates by matching this string to the SNMP community stored in its MIB● Security Level & Name – SNMP v3 only. SNMP Sensor supports the following security levels from the USM MIB (RFC 3414):▪ noAuthNoPriv – No authentication, no privacy▪ authNoPriv – Authentication only, no privacy▪ authPriv – Authentication plus privacy● Auth. Protocol & Passphrase – SNMP v3 only. Choose MD5, SHA, SHA256, or SHA512 for authentication. The SHA family is more secure than MD5, and SHA is the default. The passphrase must be at least 8 characters long; otherwise, the SNMP Sensor cannot derive the authentication key and disables itself● Privacy Protocol & Passphrase – SNMP v3 only. Choose AES-128 (the default), AES-192, AES-256, AES-192 (Cisco), AES-256 (Cisco), or DES. The 192- and 256-bit protocols come in two variants because vendors derive the longer key differently: Cisco IOS, IOS-XE and NX-OS devices need the (Cisco) variant, while Juniper, Arista and most other vendors use the plain one. A device accepts only one of the two, and the wrong choice makes every request time out instead of failing with a key error. These four protocols also need a Sensor server running Ubuntu 22.04+, Debian 12+ or RHEL 9+; on older systems the SNMP Sensor logs that the protocol is not supported by the host system and disables itself. DES is a legacy option that modern devices may refuse. The passphrase must be at least 8 characters long● Monitored Interfaces – This grid shows which interfaces will be monitored, listing the Index, Interface Name, Direction, Speed IN, Speed OUT, and Color of each. For accurate data (no mirrored graphs), add only upstream interfaces. Click [Add Interface] to add them one by one, [Edit Interface] to open the selected one (double-clicking a row does the same), and [Delete Interface(s)] to remove every selected row. Interfaces added or removed here are only written to the database when you click [Save]. Each monitored interface is defined by the following parameters:▪ SNMP Index – Each interface is identified by a unique SNMP index. Two interfaces of the same SNMP Sensor cannot share one. If the device answers SNMP, the SNMP-discovered Interfaces grid of the Add Interface window fills the field for you — click a row and its index, name and speeds are copied into the form▪ Interface Name – A short descriptive label for the monitored interface. Note that names longer than ten characters may clutter some reports. The colored square inside the field sets the color the interface uses in graphs; the default is random▪ Traffic Direction – Describes how traffic entering the interface relates to your network:◦ Unset – Treat inbound traffic as “downstream” and outbound traffic as “upstream”◦ Upstream – For external-facing or peering interfaces (e.g., connected to the Internet)◦ Downstream – For customer or internal backbone interfaces◦ Null – Traffic to Null interfaces is ignored▪ Link Speed In & Link Speed Out – Enter the interface’s speed (bandwidth, capacity)● Comments – Use this field to record notes about the SNMP Sensor. These entries are for internal reference only and are not visible elsewhere. The section stays collapsed until it holds text
[Manage Interfaces] configures many interfaces at once by querying the device, so it needs the Device IP:Port and the authentication fields to be filled in first. The Manage Interfaces window lists every interface the device reports, with a Monitor checkbox that decides which ones the SNMP Sensor keeps. [Select All Interfaces], [Unselect Interfaces], and [Invert Selection] set that checkbox in bulk, while [Set Traffic Direction] applies one direction to every row at once.
[Save] writes the configuration. When you remove an interface that a Reports » Dashboards widget, a Sensor Cluster, or a Scheduled Reports entry still refers to, the Console lists those references and asks whether to delete the interface anyway. [Delete] appears only after the SNMP Sensor has been saved once, asks for confirmation, and warns in the same way when the SNMP Sensor itself is still referenced.
To start the SNMP Sensor, click the on/off switch next to its name in Configuration » Components and confirm. Watch the event log to confirm it starts successfully. If traffic values in Reports » Devices » Overview remain incorrect after about 5 minutes, follow the troubleshooting steps below.
19.1. SNMP Sensor Troubleshooting
License key not compatible with the existing server in the event log, it means the server is unregistered. Send the Hardware Key (found in Configuration » Servers » [Server]) to <sales@andrisoft.com>[root@localhost ~]# snmpwalk -c <community> -v2c <router_ip> 1
Privacy Protocol AES-192/AES-256 not supported by the host system, the Sensor server’s operating system is too old for these protocols. Upgrade it to Ubuntu 22.04+, Debian 12+ or RHEL 9+, or use AES-128