25. Network & Policy » Whitelist Template
Whitelists can be used to prevent Wanguard Filter from blocking traffic you consider essential. By default, during inbound attacks, destination ports and IPs are blocked only in worst-case scenarios when no other attack pattern is identified. However, sometimes it’s preferable to allow possibly malicious traffic to enter rather than risk blocking critical traffic.
To add a Whitelist Template, go to Configuration » Network & Policy » [+] and select [Whitelist Template]. The Add Whitelist Template window asks for a mandatory Whitelist Template Name; pressing [Save] or the Enter key creates the template and immediately opens its configuration. To configure an existing Whitelist Template, go to Configuration » Network & Policy and click its name.
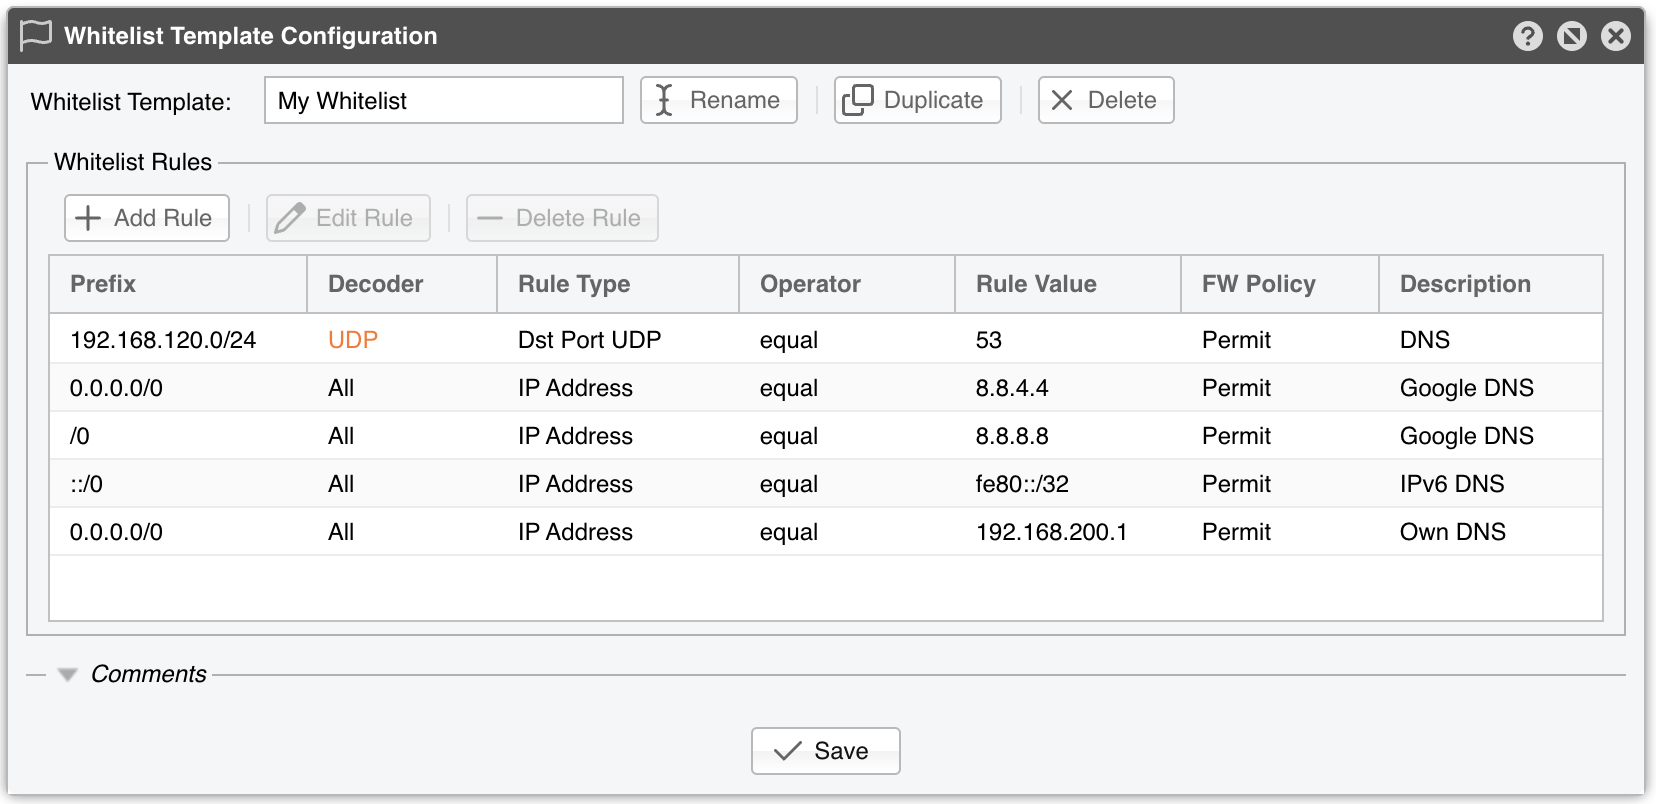
The toolbar at the top of the Whitelist Template Configuration window holds the name of the template, followed by three buttons that take effect immediately, without waiting for [Save]:
● Whitelist Template – The name of the template. It is mandatory● [Rename] – Stores the name currently shown in the field. Editing the name and pressing [Save] does not rename the template; only [Rename] does● [Duplicate] – Asks for confirmation, then creates a copy of the template with all of its rules. The copy is named after the stored name of the template, followed by (copy)● [Delete] – Asks for confirmation, then deletes the template together with all of its rules. A Whitelist Template that a Filter still refers to cannot be deleted; the Console names the Filters that use it
The Whitelist Rules section lists the rules of the template. [Add Rule] inserts a new rule at the top of the grid, pre-filled with the Prefix /0, the Decoder All, the Rule Type IP Address, the Operator equal and the FW Policy Undefined. [Edit Rule] and [Delete Rule] become available once a rule is selected, and a rule can also be edited by double-clicking it. Drag a rule to move it up or down; [Save] stores the order of the rules along with the rules themselves.
A collapsed Comments section at the bottom of the window stores internal notes about the Whitelist Template; they are not displayed anywhere else. [Save] writes both the rules and the Comments, and it closes the window.
Note
When a filtering rule matches a whitelist entry, it appears with a white flag. However, it is never applied to the firewall.
25.1. Whitelist Template Permissions
Administrator and Operator users always have full access to every Whitelist Template. A Guest user is limited by the Whitelist Template(s) access policy of its role, which also selects the templates the user is allowed to open at all:
● No access – The Whitelist Templates cannot be opened● Allow read-only access to the selected Whitelist Template(s) – The title of the window is suffixed with [READ-ONLY], and [Add Rule], [Edit Rule], [Delete Rule] and [Save] are grayed out● Allow limited access to the selected Whitelist Template(s) – The title of the window is suffixed with [RESTRICTED]. Only the rules whose Prefix falls inside the IP Groups the role can access are listed, a rule whose Prefix falls outside them cannot be saved, and the Comments are never saved
In all three cases the name of the template is read-only, and [Rename], [Duplicate] and [Delete] are grayed out.